As she explores the untamed frontier in Horizon Forbidden West, Aloy comes across a camp led by two Carja Scholars in the Drowned Hopes quest.
After recognising the ancient artifact they found as a hard drive, she discovers coordinates for a mysterious Mobile Cover System Prototype, but will have to dive underwater to find the rest of the information she needs.
You can only complete the Drowned Hopes quest once you have crafted the underwater breather during the main story mission, The Sea of Sands. Once that’s done, you can return to this area to finish Drowned Hopes off.
Horizon Forbidden West Drowned Hopes - Where is the underwater security console?
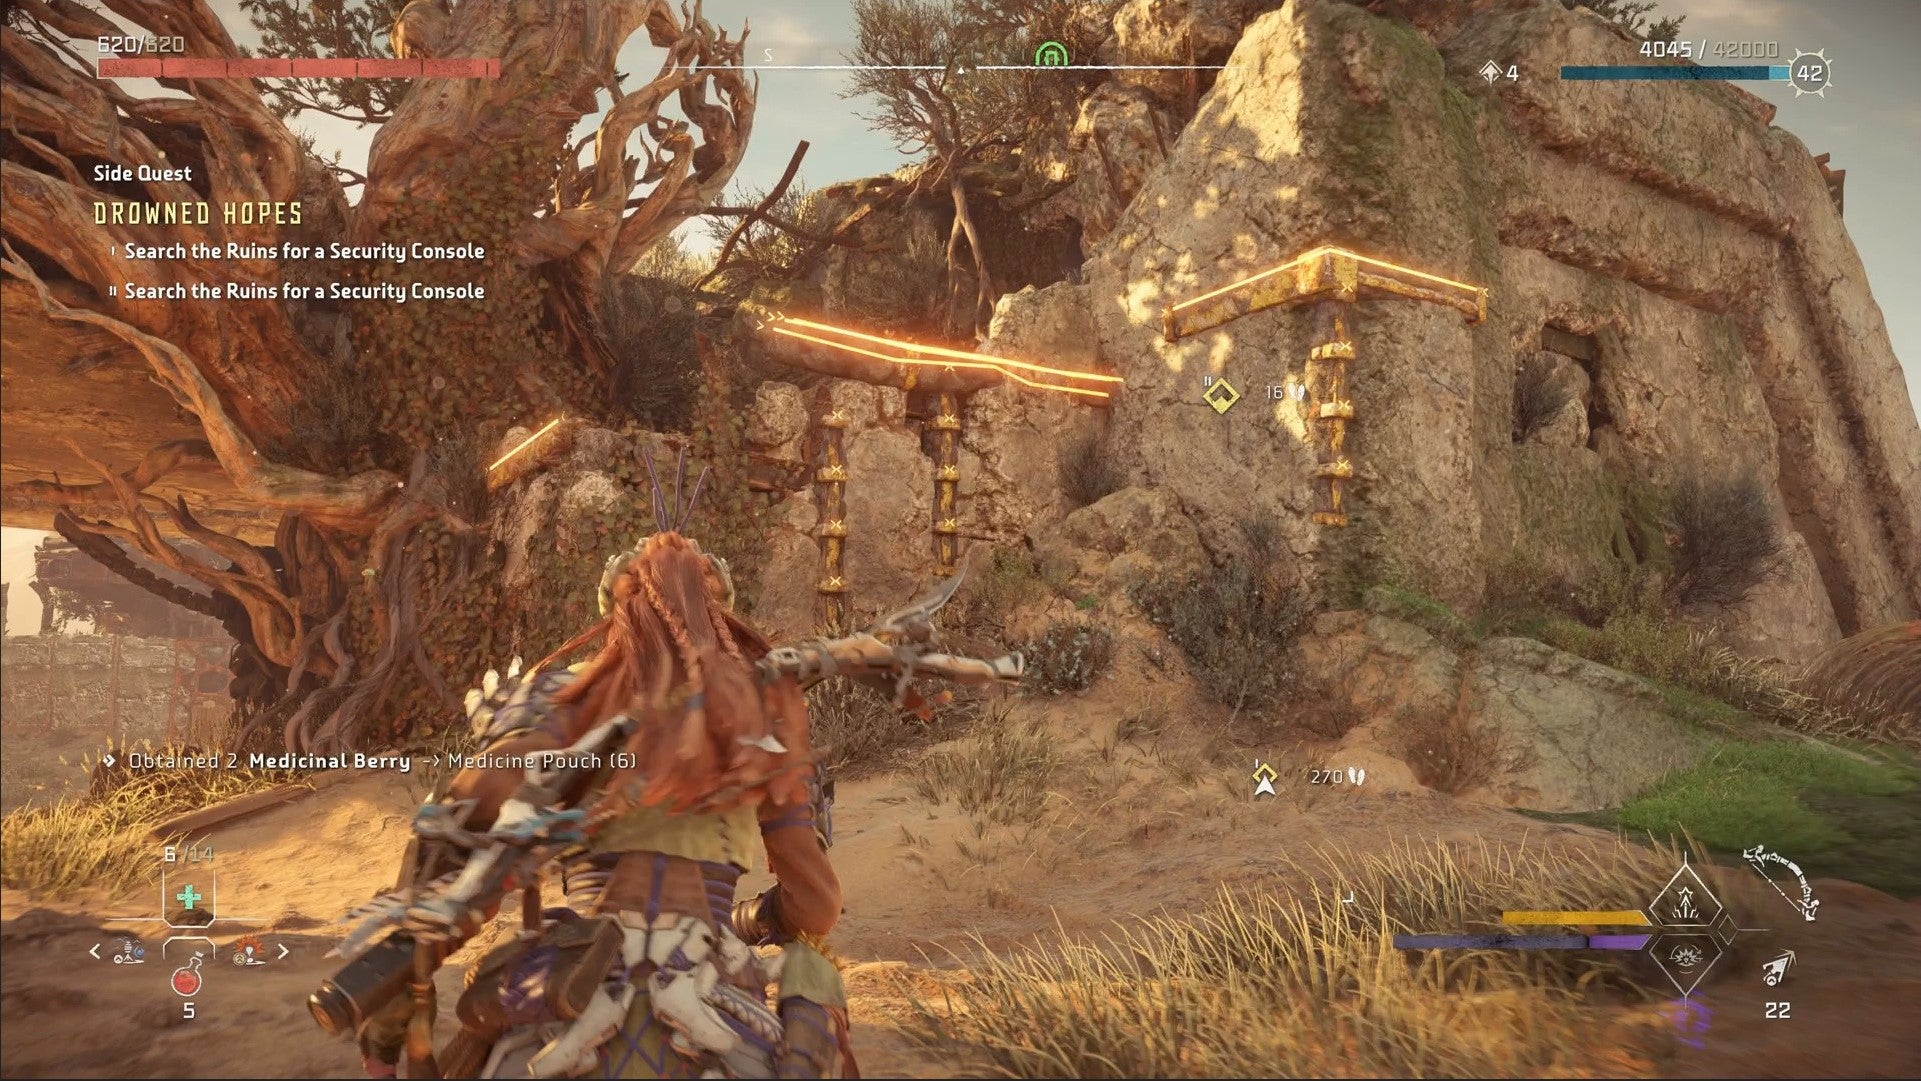
In the southern area of No Man’s Land, you find a Carja camp where two Carja Scholars, Gendas and Rushavid, are leading an archeological expedition.
Before they were chased out of their dig site by machines, they found an old hard drive containing data about an innovative protective device.
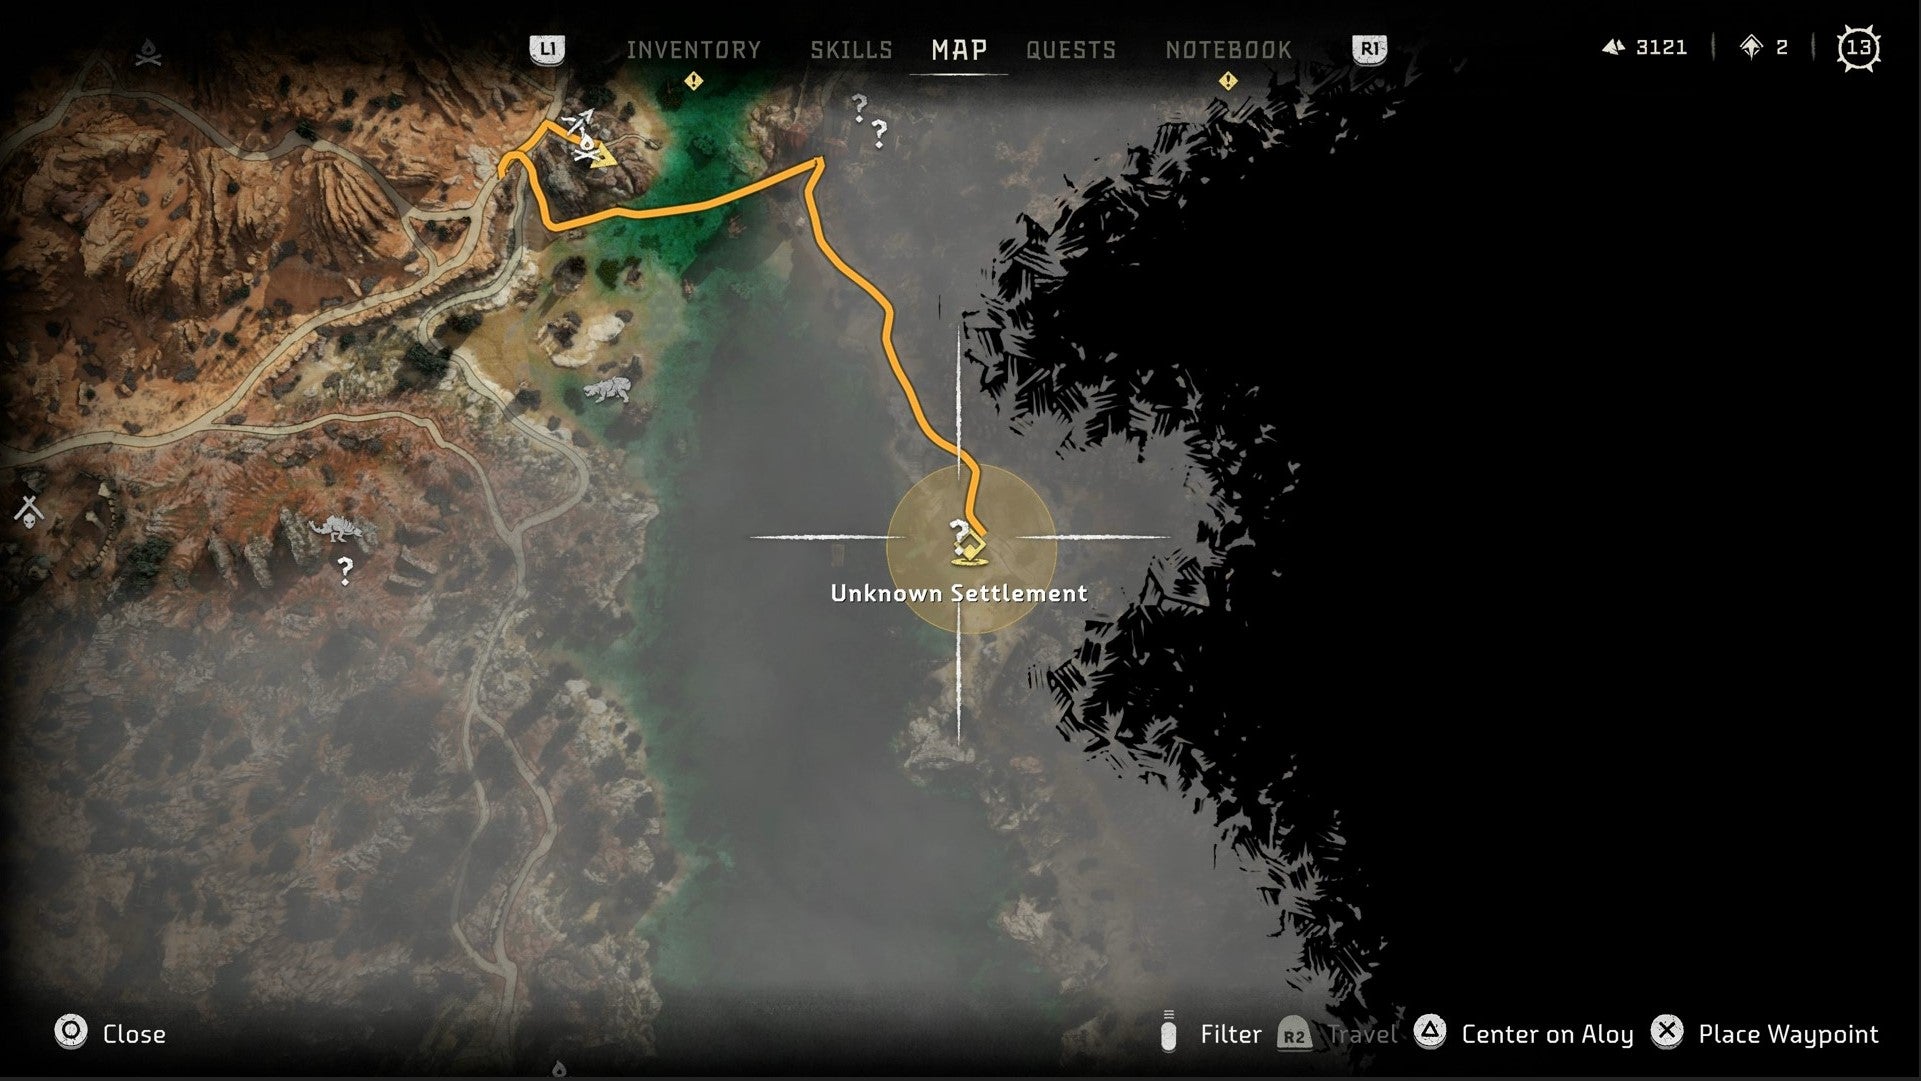
Make your way across the lake to the dig site at Jagged Deep Delve.
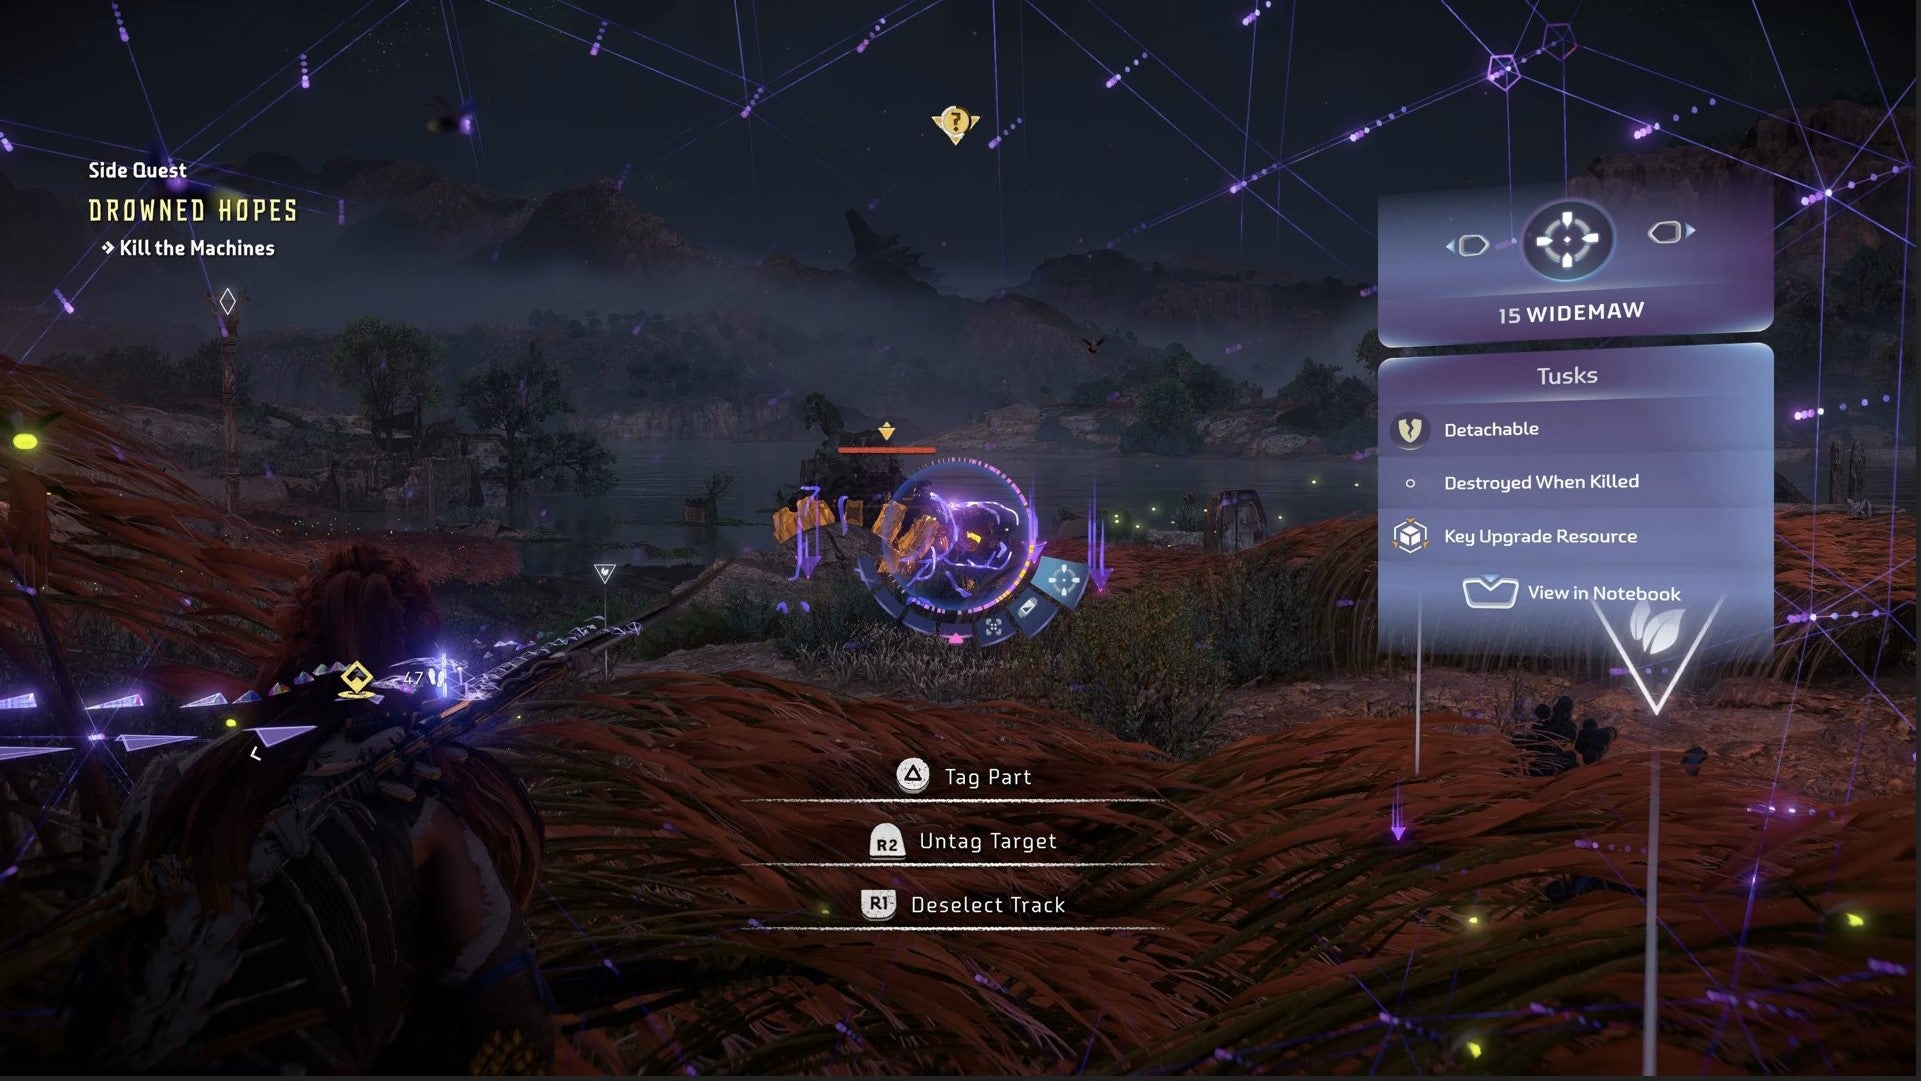
Here you’ll find the hippopotamus machine, Widemaw, patrolling.
Defeat them by any means necessary - laying explosive traps in their path helps - then scan the area with your Focus.
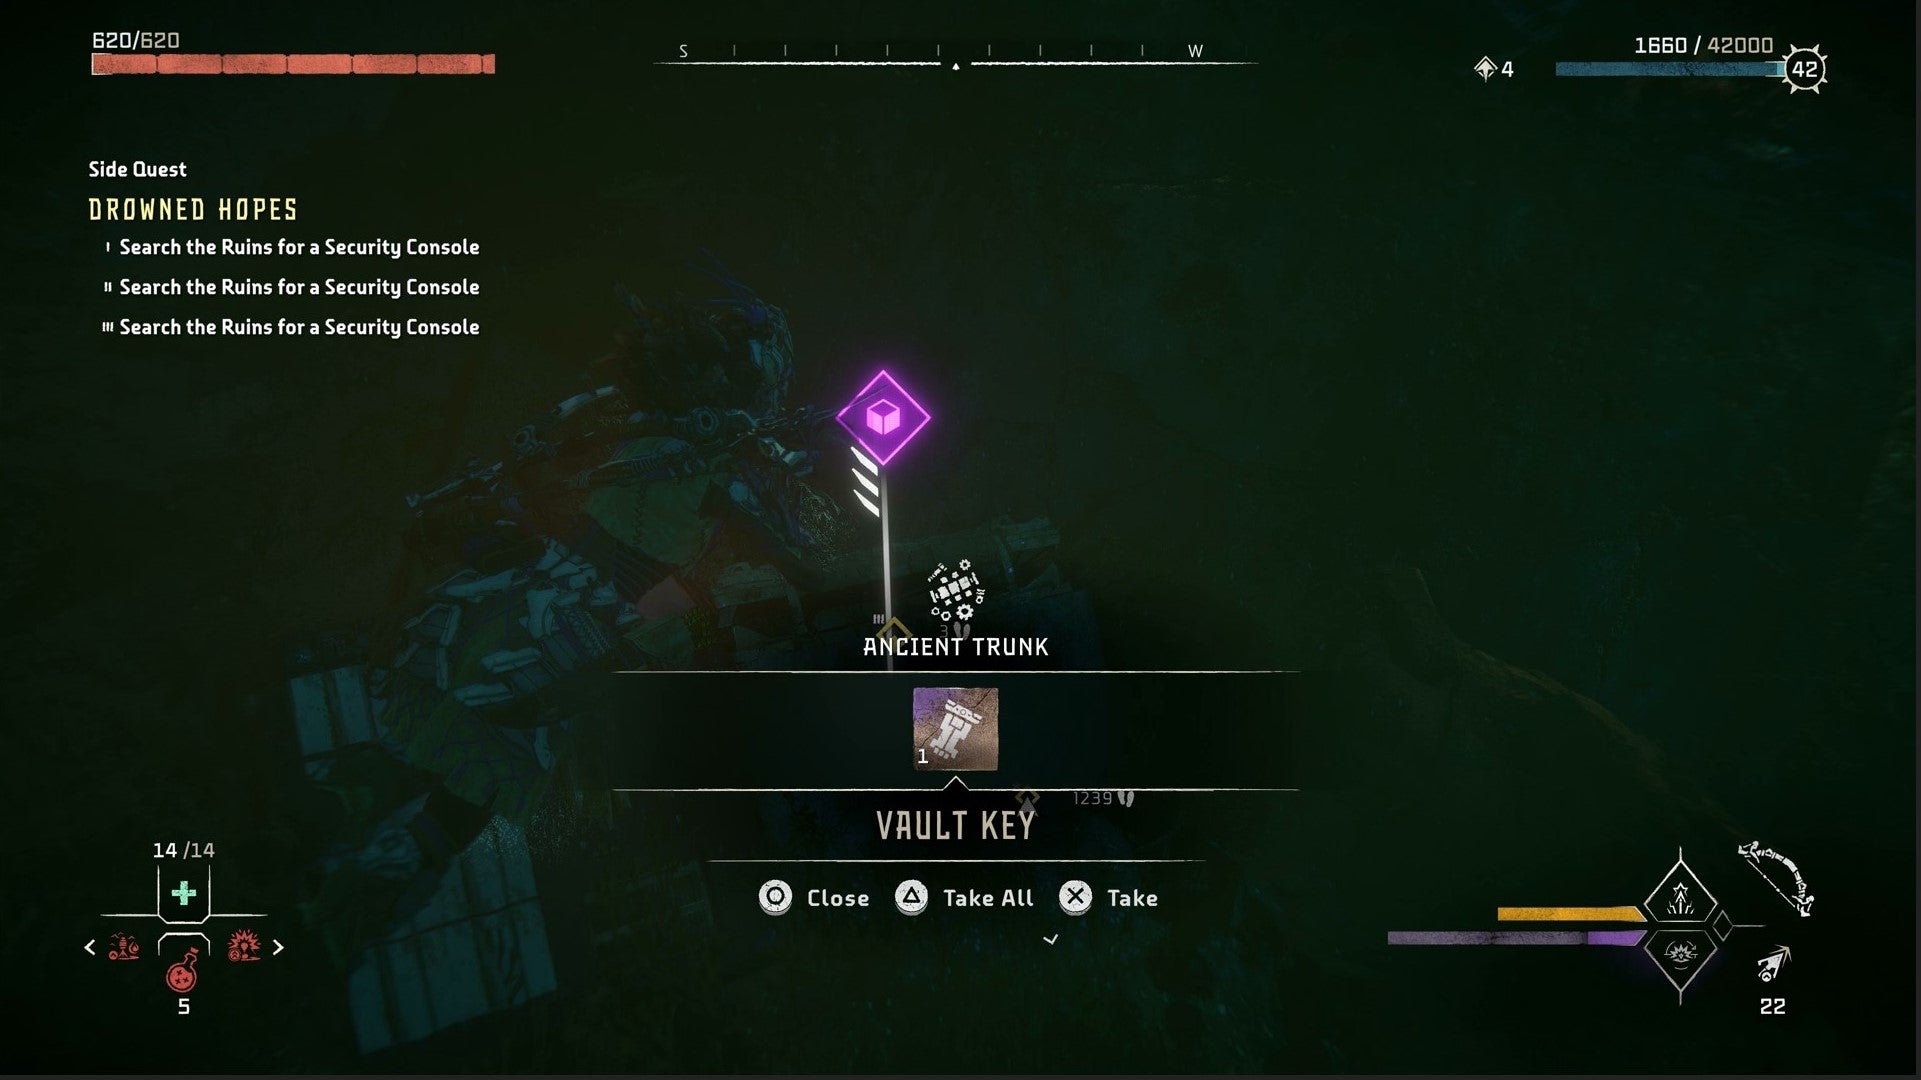
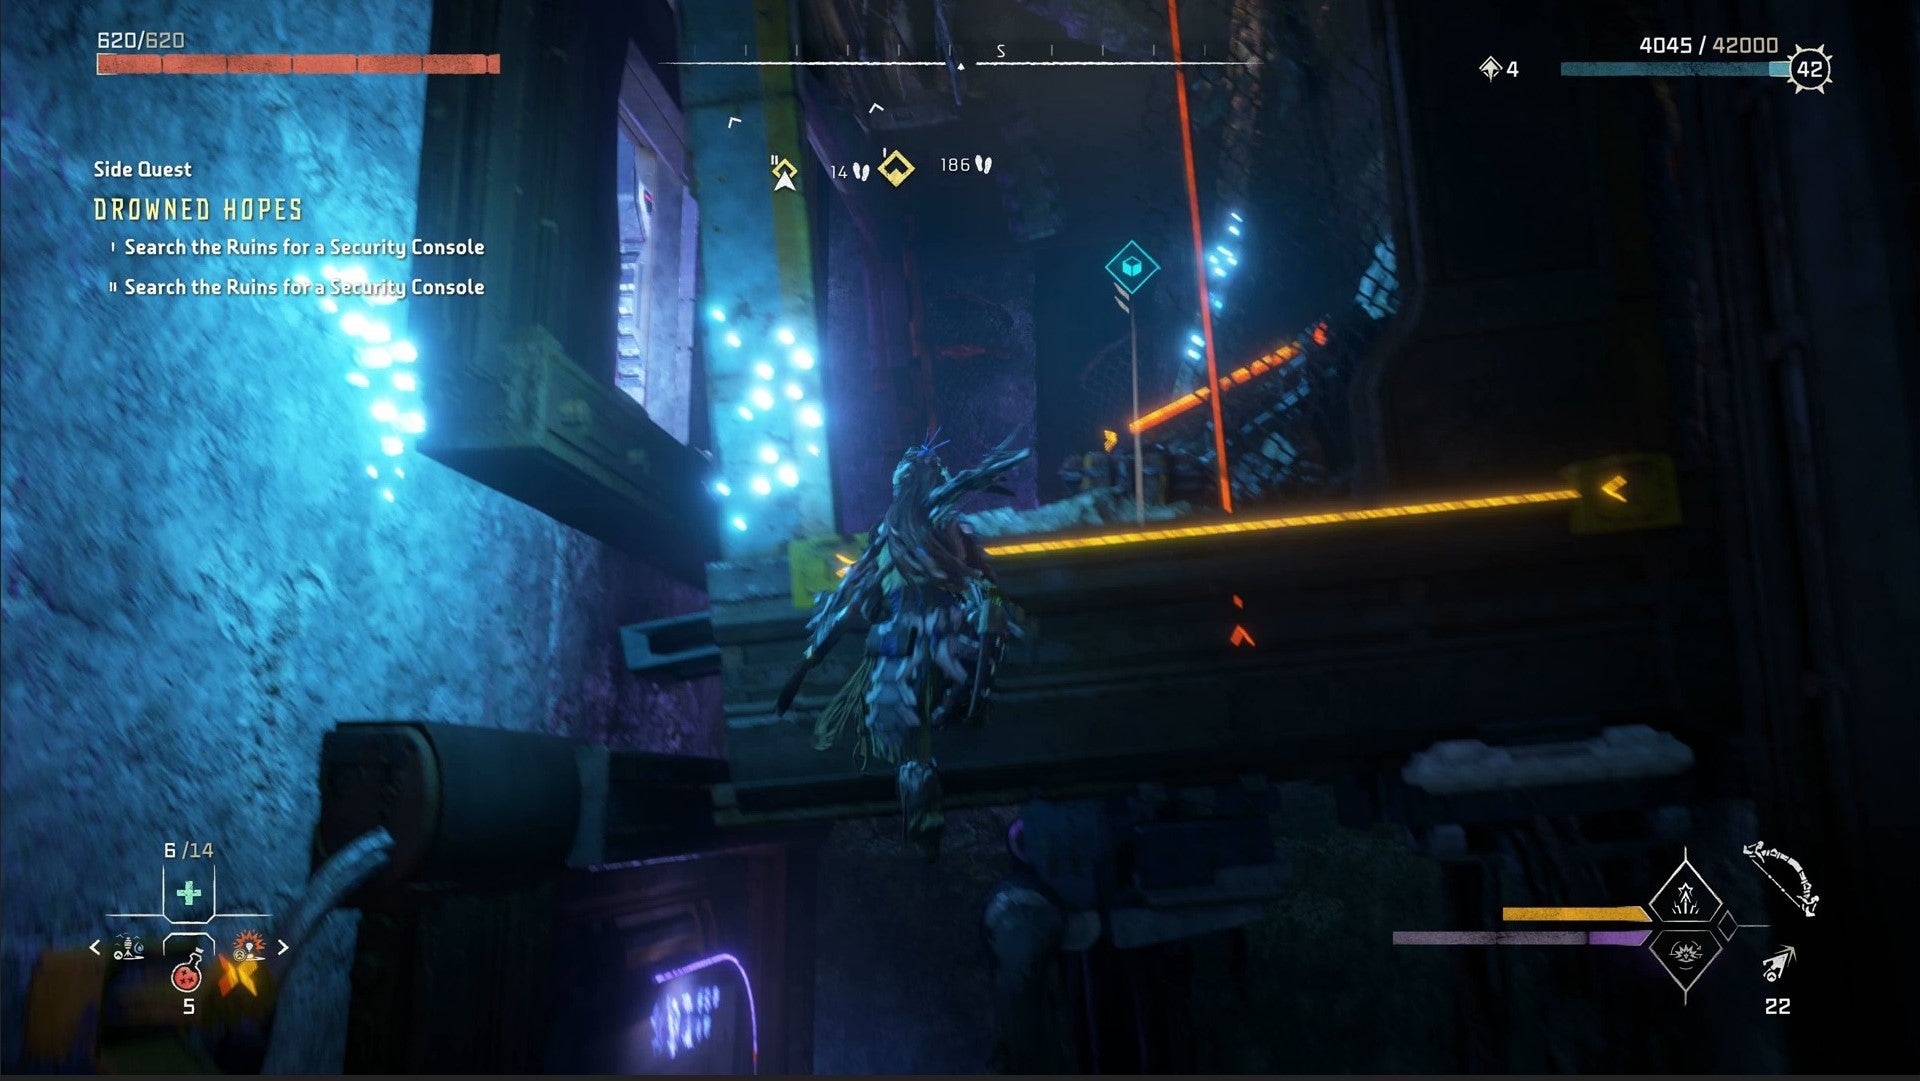
Off the western shore, you’ll see the signal of a sunken wreck where you can find a security console and locked container.
Again, you will need the underwater rebreather from the Sea of Sands story mission to get down there for long enough, but once you’ve interacted with the console, you will be able to get a Vault Key from the container and coordinates for another console.
Horizon Forbidden West Drowned Hopes - Where are the Vault Keys?
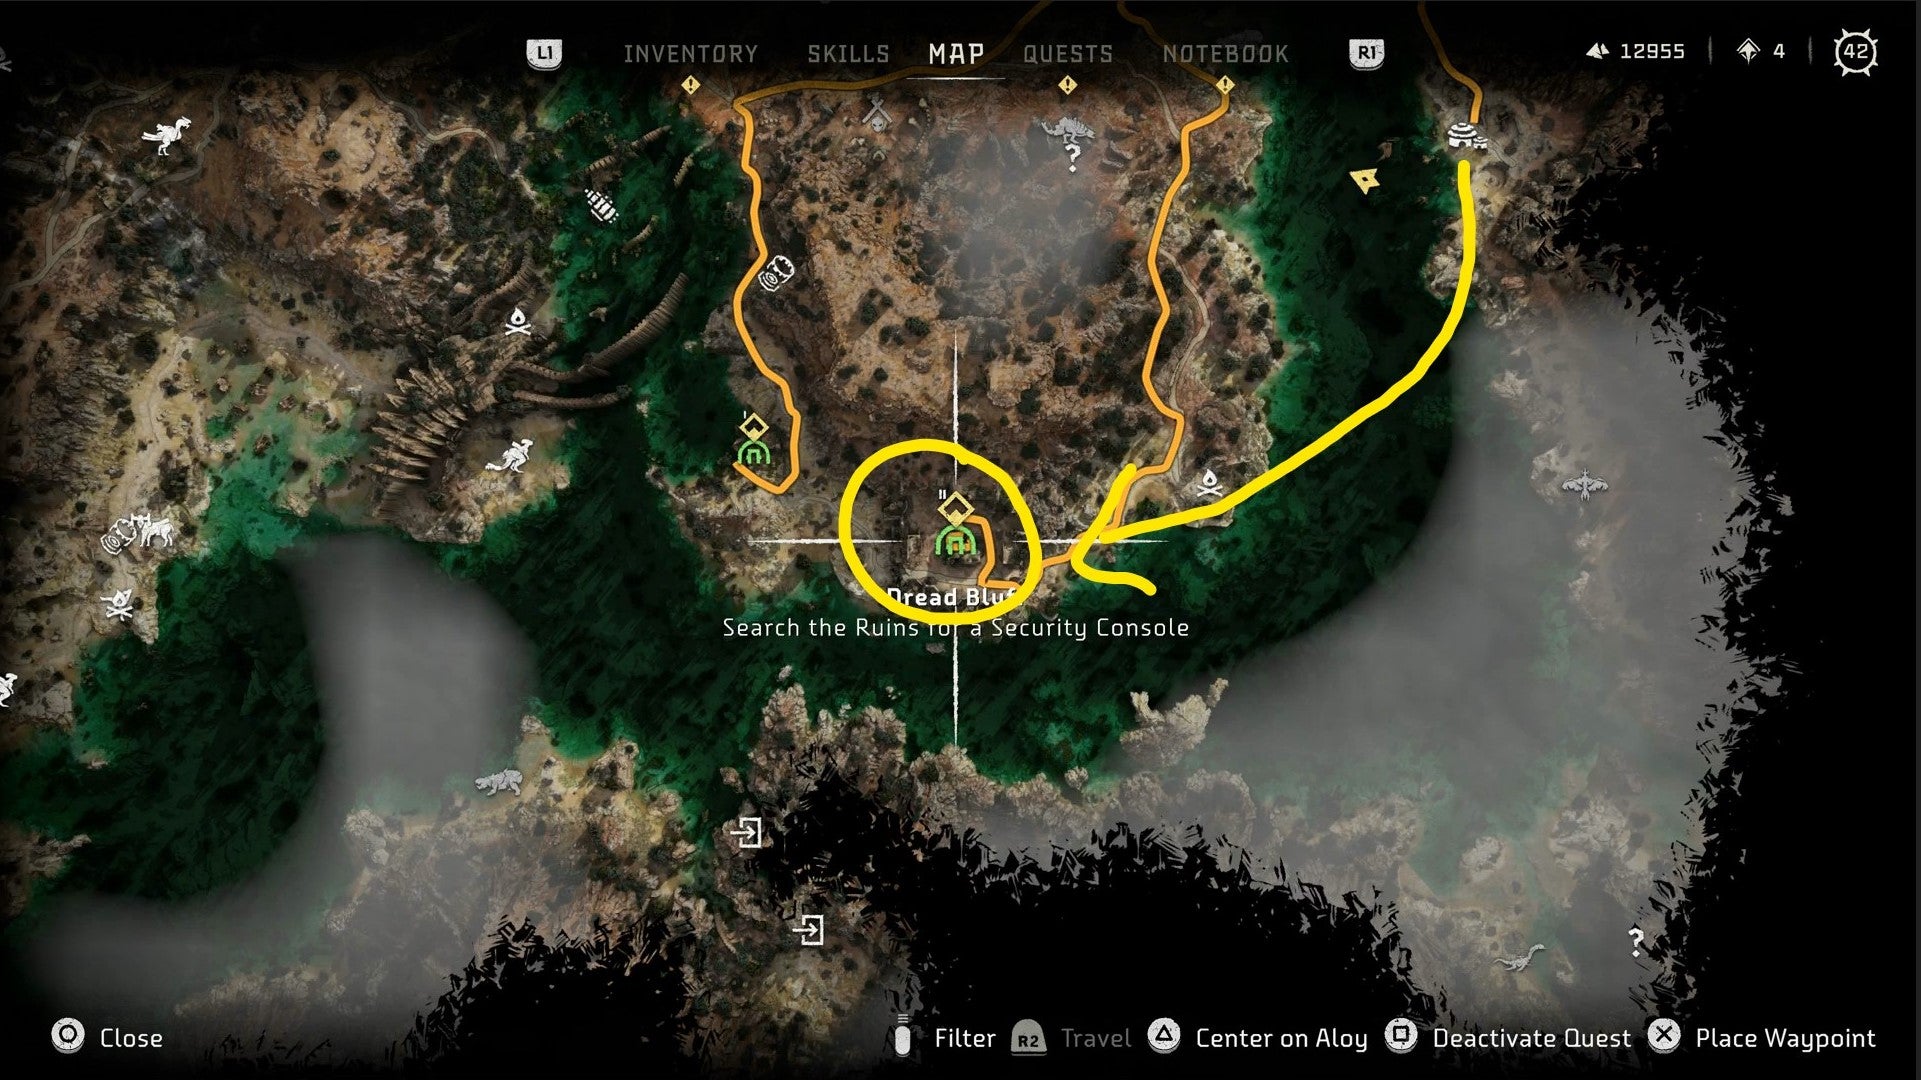
The next security console is found at Dread Bluff to the southwest.
There you will find a tough fight waiting for you, including a Skydrifter, Scrapper, and Ravager. You can either defeat them, or sneak past into the underground facility.
To get inside, look for a climbable building in the middle of Dread Bluff.
There’s a hole in the middle of the building you can then climb to make your way in.
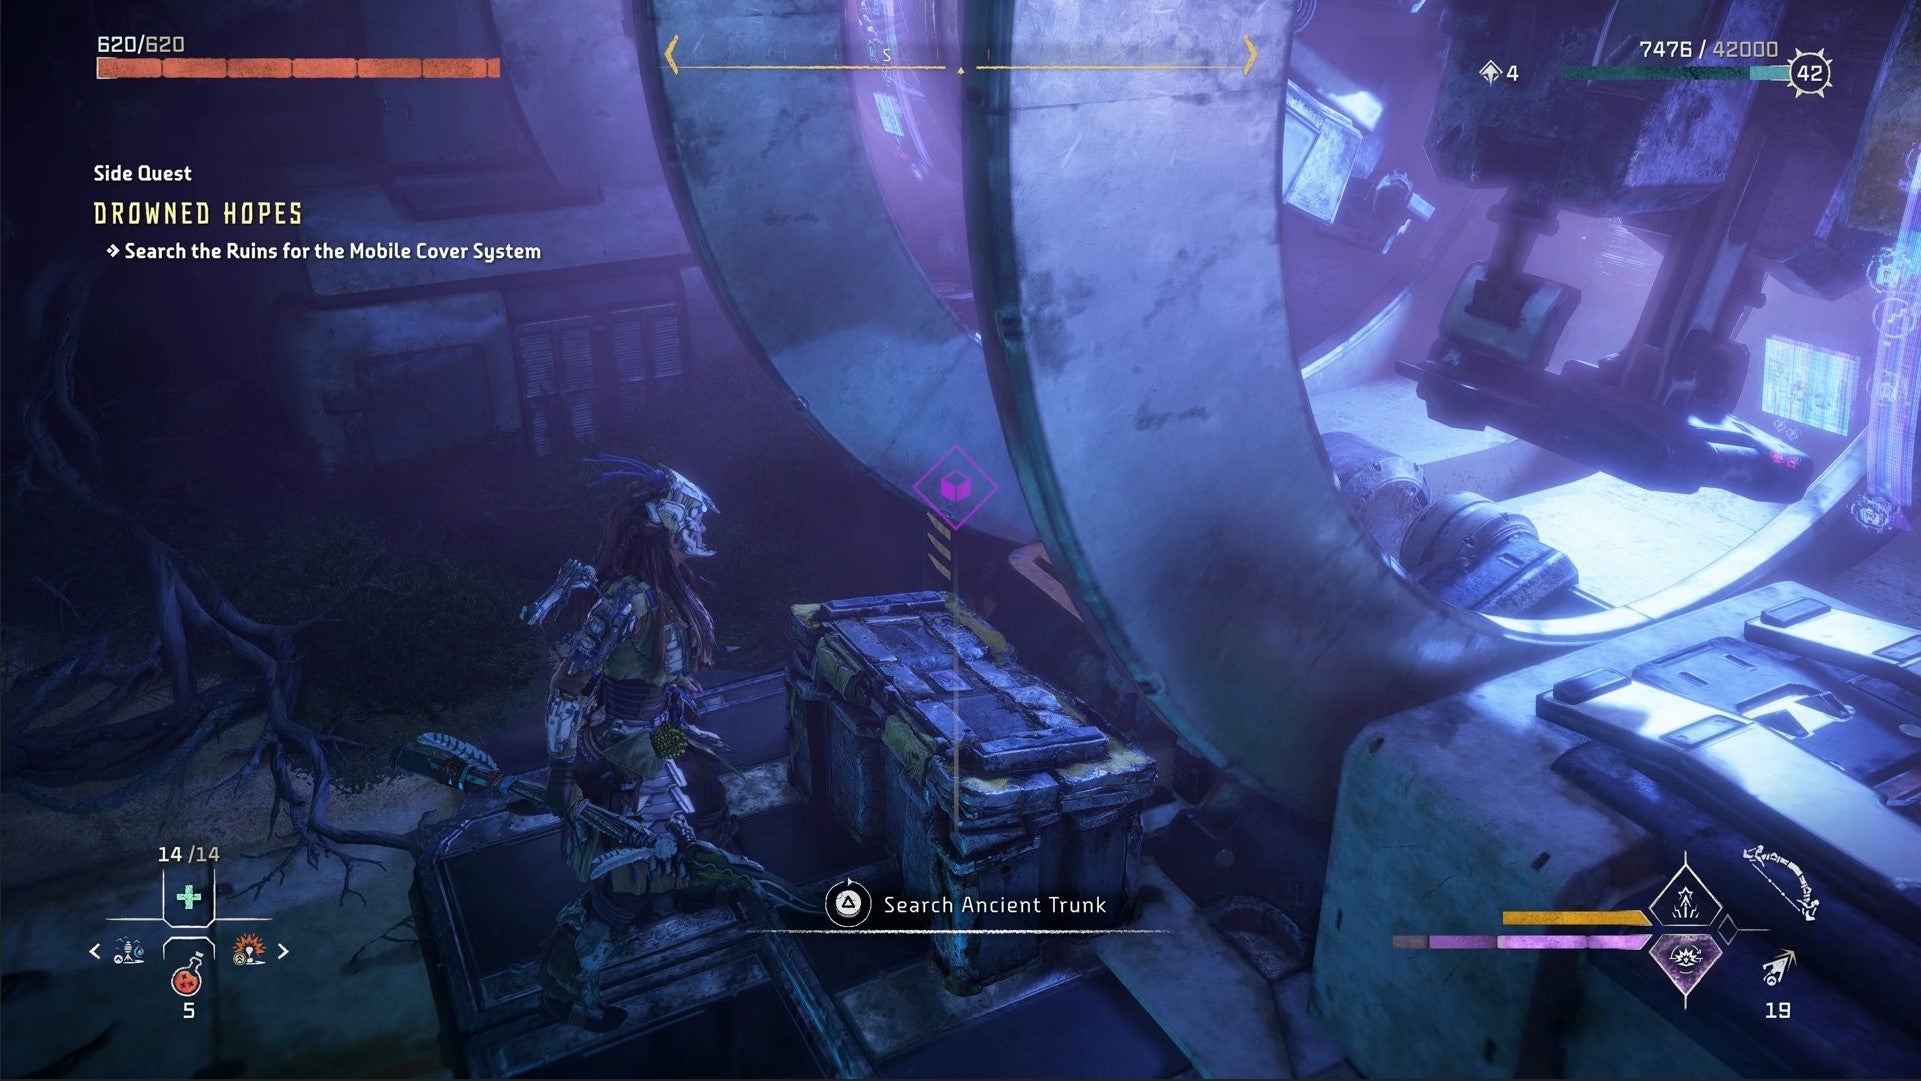
Descend until you reach a crate behind you that you can jump backwards towards, then go around the corner and into the office to find the security console.
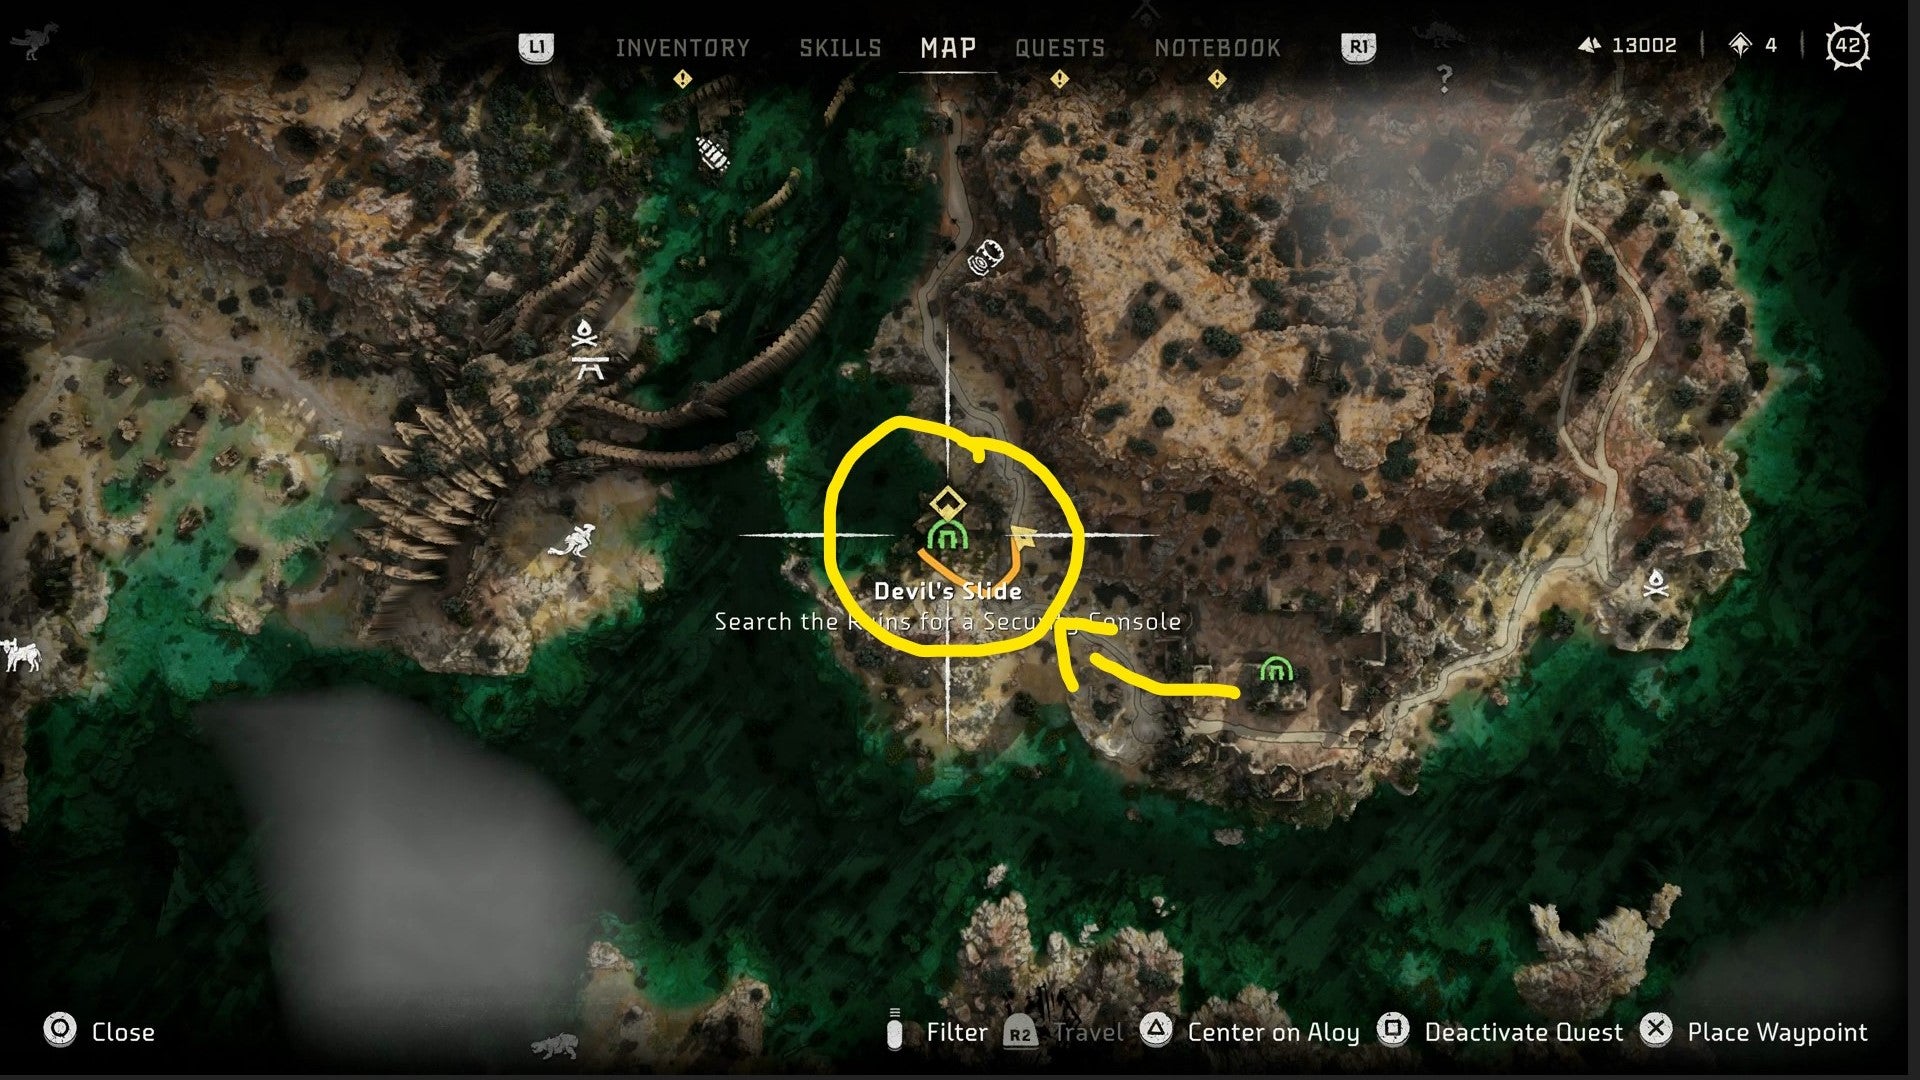
Grab the second Vault Key and climb back up the shaft or fast travel out of the facility to continue. The next set of coordinates leads you to Devil’s Slide a little to the west.
Hop into the water, dive down and pry open the door to get inside.
Continue through the submerged facility and grab the final Vault Key from the container next to the console.
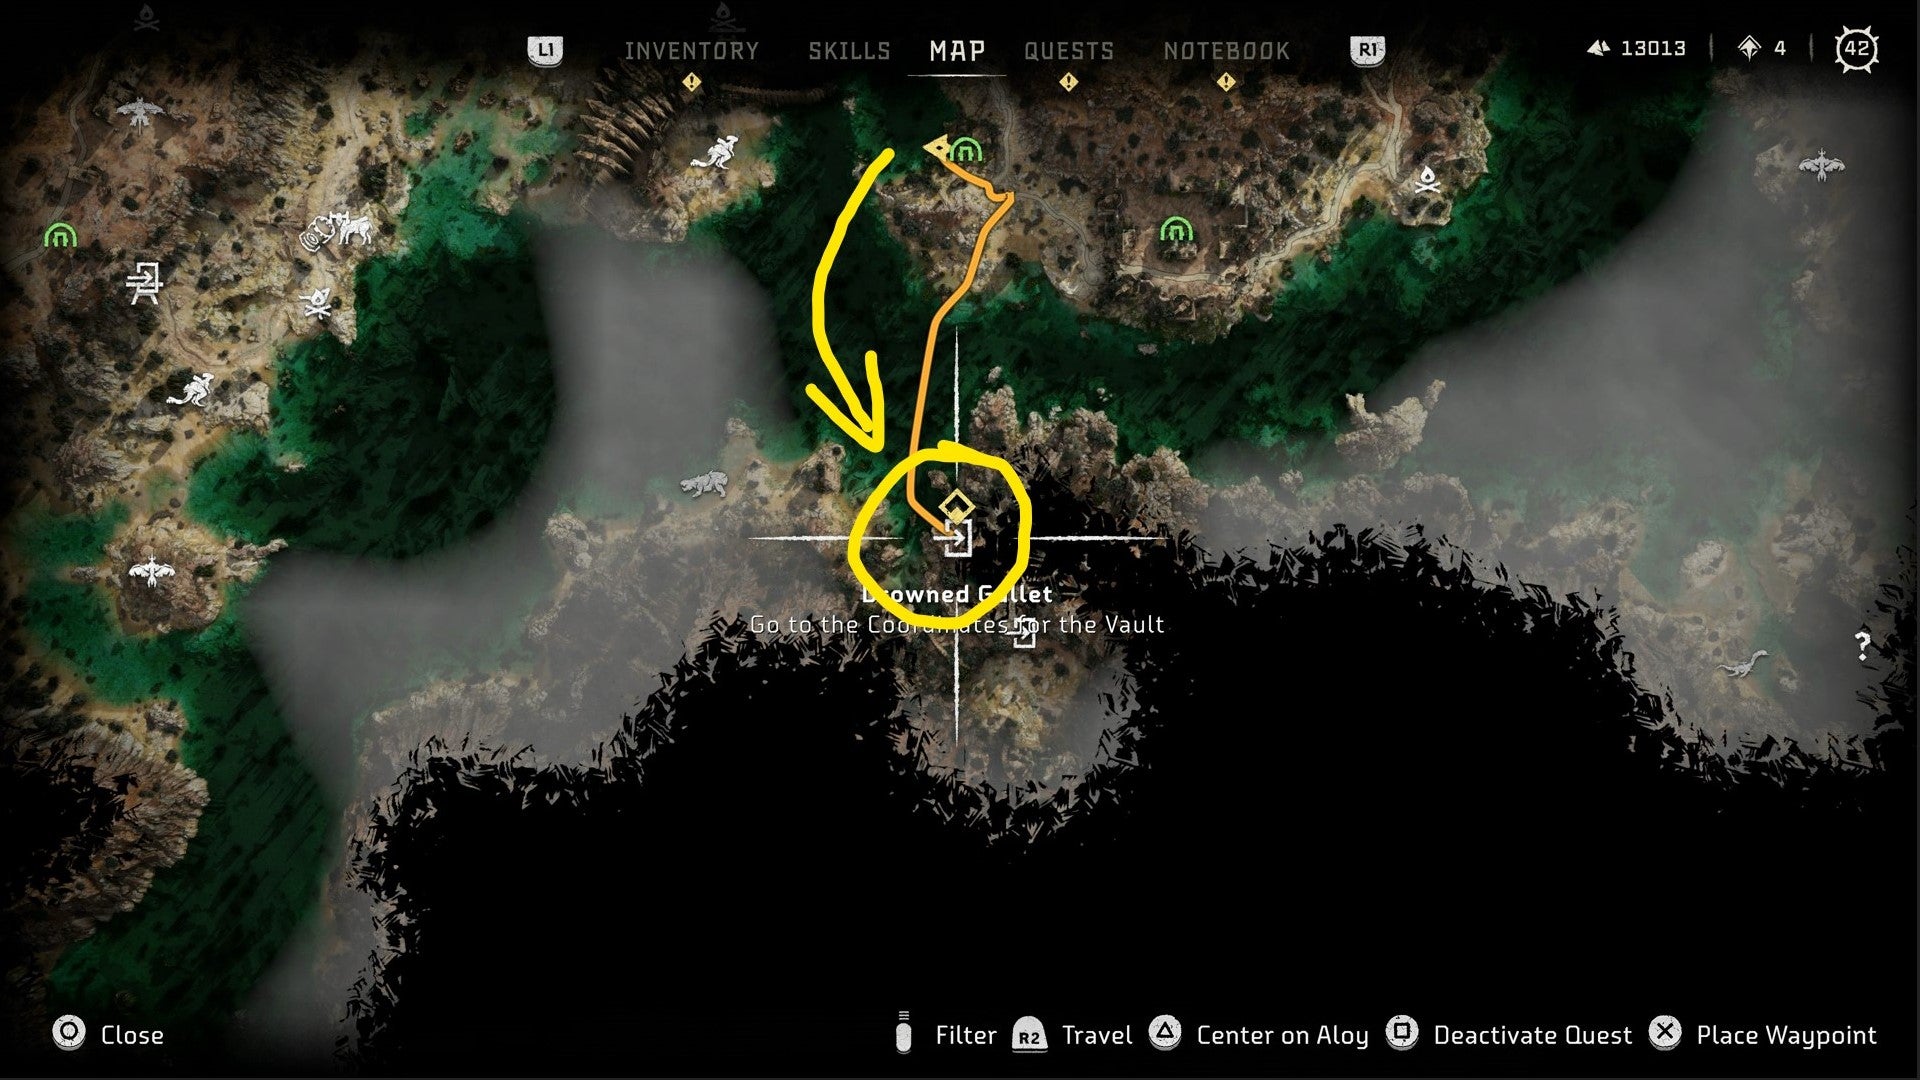
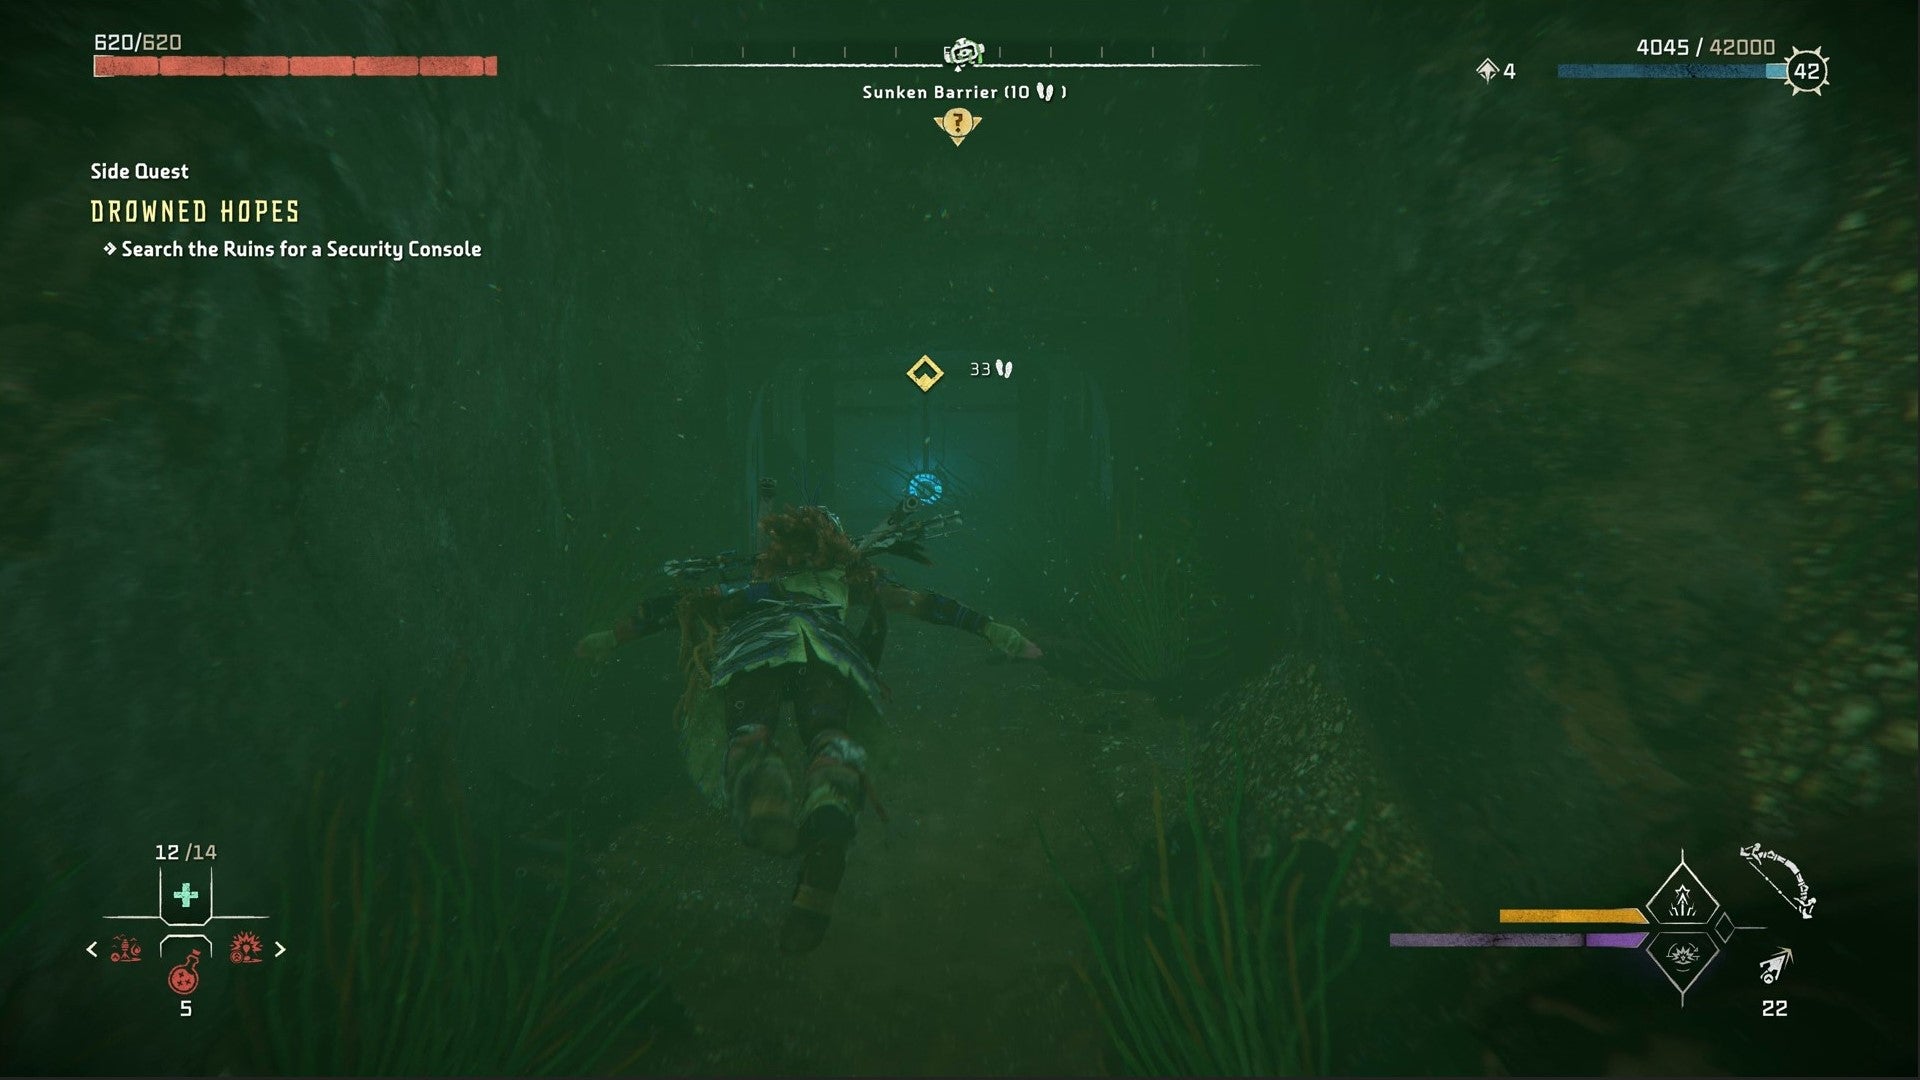
Your last set of coordinates sends you south to Drowned Gullet. Again, swim underwater through the entrance and make your way along the path when you resurface.
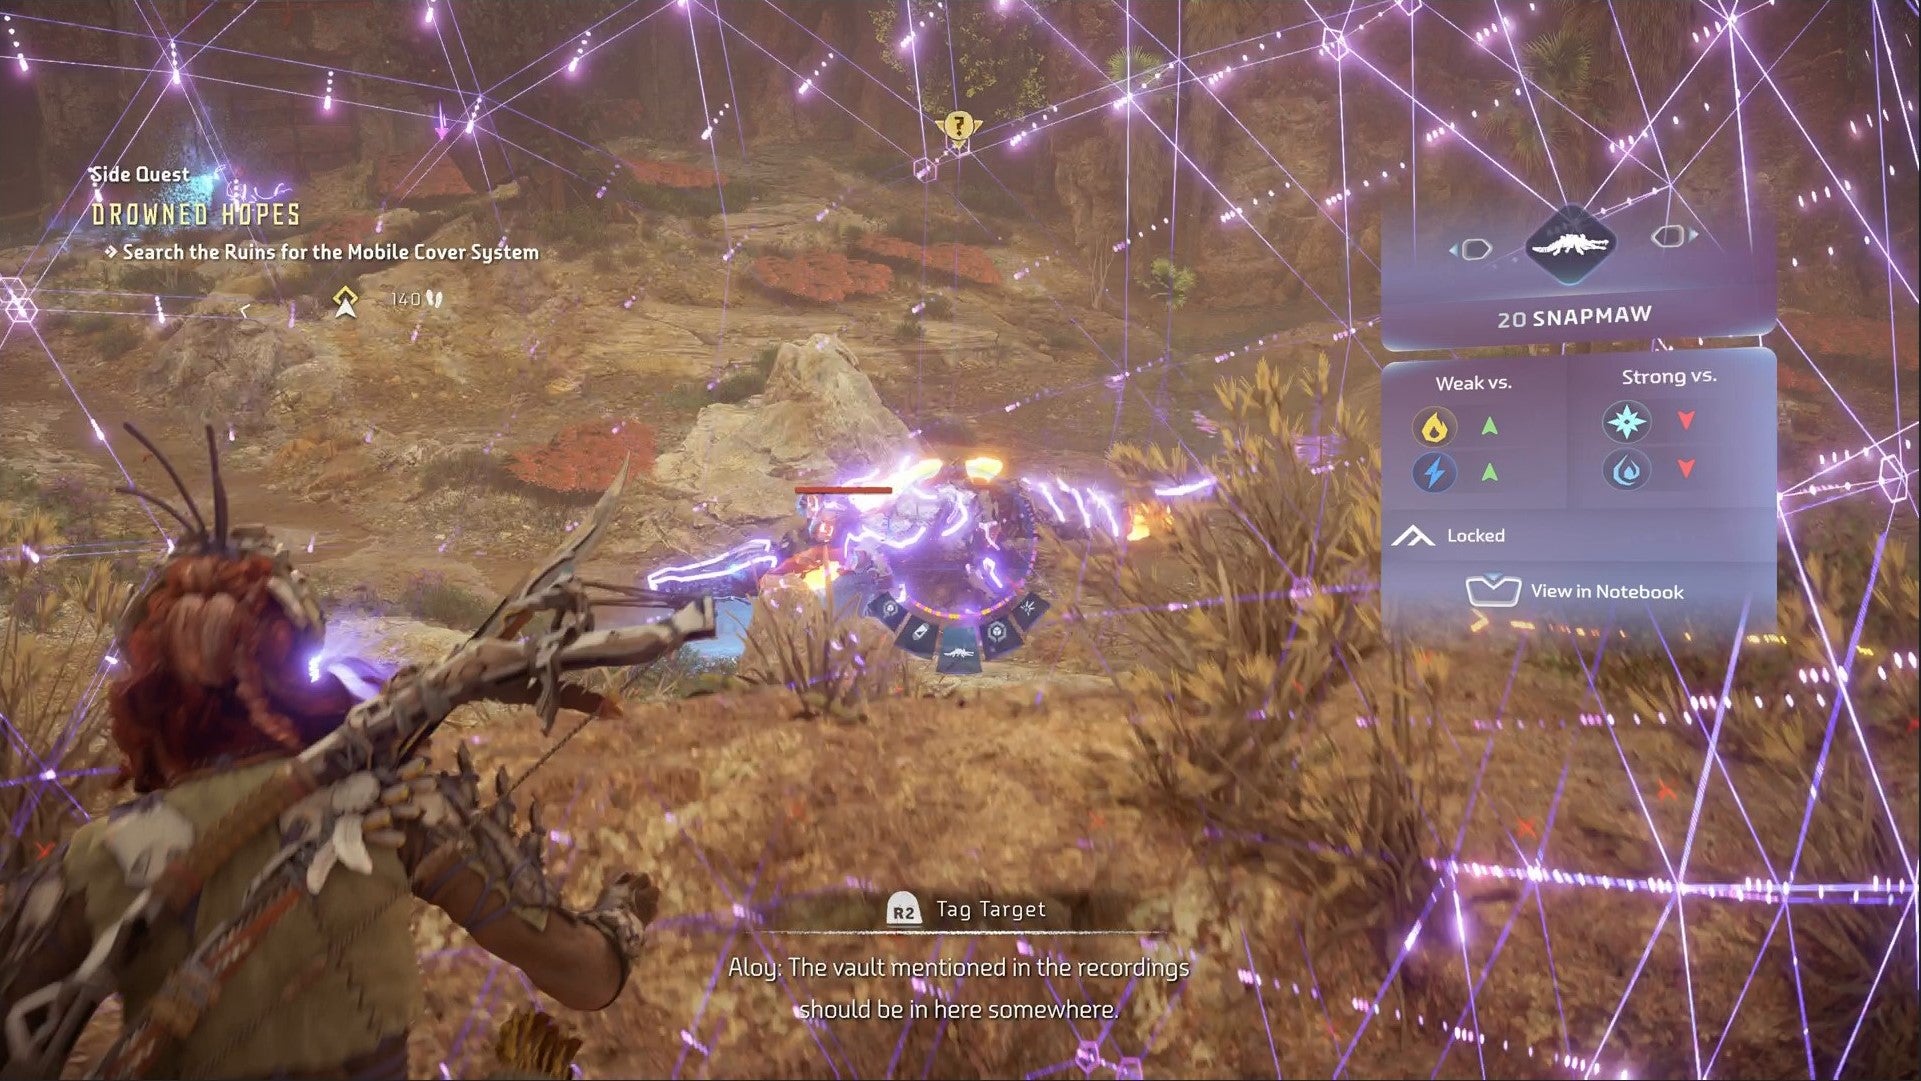
You will find yourself in a clearing with a Snapmaw and two tough Apex Leaplashers.
Focus on the Snapmaw first since it’s actually much easier, despite its size. If you stay up on the ridge overlooking the machines, you seem to be able to take them out at a distance without them locking onto you properly.
On the other side of the clearing, make your way into the facility and slot the Vault Keys.
Grab the Mobile Cover System Prototype from the cache and either swim out or fast travel back to the Carja camp.
To see this content please enable targeting cookies. Manage cookie settingsHorizon Forbidden West Drowned Hopes - How to make the Mobile Cover System

Speak to the Carja Scholars about what you found and they’ll be impressed with the technology you were able to surface.
With the Hard Drive they give you, use the Workbench next to them, and Aloy will be able to craft the Guardian Tripcaster from the quest item menu.
Finishing the job completes the quest, but the real prize is the new toy you just got. You can now set up high-explosive tripwires, which are always useful.
Or you can lay down defensive barriers which absorb hits then explode after a short time.
For more on what you can find hidden in the Tenakth tribe lands, here’s our Horizon Forbidden West guide.
ncG1vNJzZmivp6x7t7ORbW5nm5%2BifKm70aKxqKZdm7yzrsidm56mXayytMCMnamor56asW60zqmcrGWnlrmswMerpq6fmGK1sMOMnaZmoV2btq%2BwjK2fnmWlo7Gmvtaaq56qXaiypMHRoquyZZOku7S7y56q